
The joy of Christmas lies not only in the exchange of gifts but also in the effort and thoughtfulness behind them. What better way to convey your love and appreciation than by creating handmade gifts? DIY Christmas gifts not only showcase your creativity but also carry a personal touch that is cherished by the recipients. Here, we bring you a collection of easy and affordable ideas for DIY Christmas gifts. From heartfelt crafts to delicious treats, these ideas will inspire you to add a touch of homemade magic to your holiday season.
1. Mason Jar Snow Globe ($10-15)
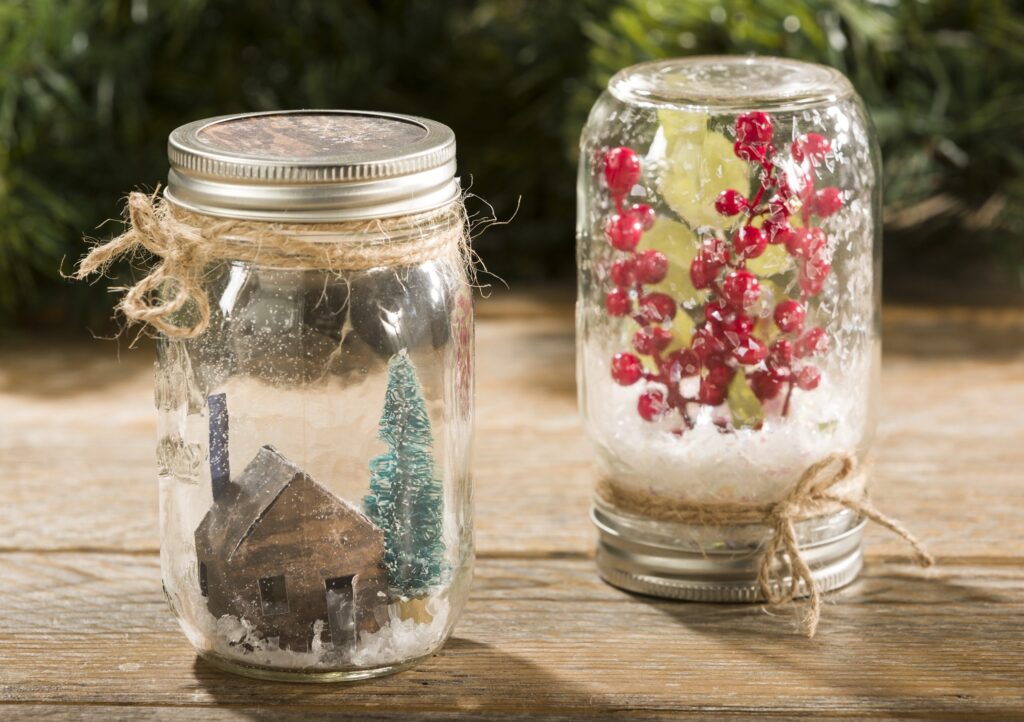
Materials
- Mason jar with lid
- Small figurine or ornament
- Glitter
- Epoxy glue
- Distilled water
- Glycerin (optional)
- Hot glue gun
Instructions
- Attach the figurine or ornament to the inside of the jar lid using epoxy glue.
- Fill the jar with distilled water, leaving some space at the top.
- Add a pinch of glitter to the water.
- If desired, add a few drops of glycerin to slow down the glitter’s descent.
- Carefully screw the lid back on the jar.
- Secure the lid with a hot glue gun for extra reinforcement.
- Shake the snow globe gently and watch the enchanting winter scene come to life!
Tips
- Choose a figurine that matches the recipient’s interests or hobbies.
- Experiment with different types and colors of glitter for a personalized touch.
2. Hand-Stamped Tea Towels ($5-10)
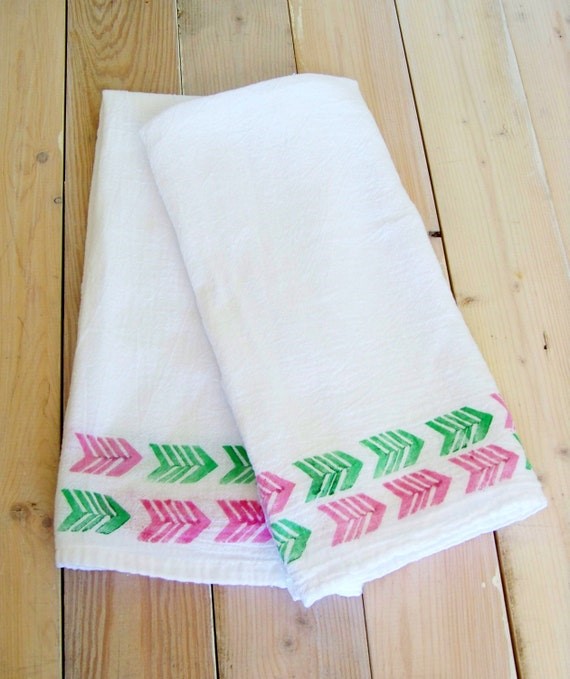
Materials
- Plain tea towels
- Rubber stamps
- Fabric paint
- Ink pad
Instructions
- Lay the tea towel flat on a protected surface.
- Apply fabric paint to the rubber stamp using an ink pad.
- Carefully press the stamp onto the tea towel, creating a design.
- Repeat the stamping process with different patterns or letters to customize the towel.
- Let the paint dry completely before using or gifting.
Tips
- Use holiday-themed stamps, such as snowflakes or reindeer, for a festive touch.
- Experiment with different colors of fabric paint to match the recipient’s kitchen décor.
3. Scented Candles in Teacups ($10-15)
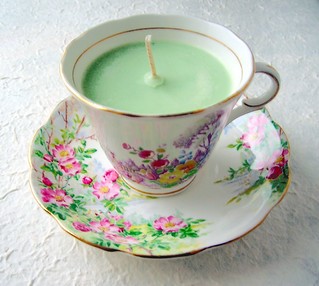
Materials
- Teacups or vintage containers
- Candle wicks
- Soy wax flakes
- Essential oils (e.g., lavender, vanilla, or citrus)
- Double boiler or microwave-safe container
- Popsicle sticks or clothespins
Instructions
- Place the candle wick in the center of the teacup.
- Melt the soy wax flakes using a double boiler or in a microwave-safe container, following the manufacturer’s instructions.
- Add a few drops of your chosen essential oil to the melted wax and stir gently.
- Carefully pour the scented wax into the teacup, ensuring the wick stays centered.
- Hold the wick upright using popsicle sticks or clothespins until the wax solidifies.
- Trim the wick to a suitable length, leaving approximately half an inch.
- Decorate the teacup with ribbon or a personalized label.
Tips
- Look for unique and vintage teacups in thrift stores for a charming and eco-friendly gift.
- Experiment with different essential oil combinations to create personalized scents.
4. Personalized Photo Coasters ($5-10)
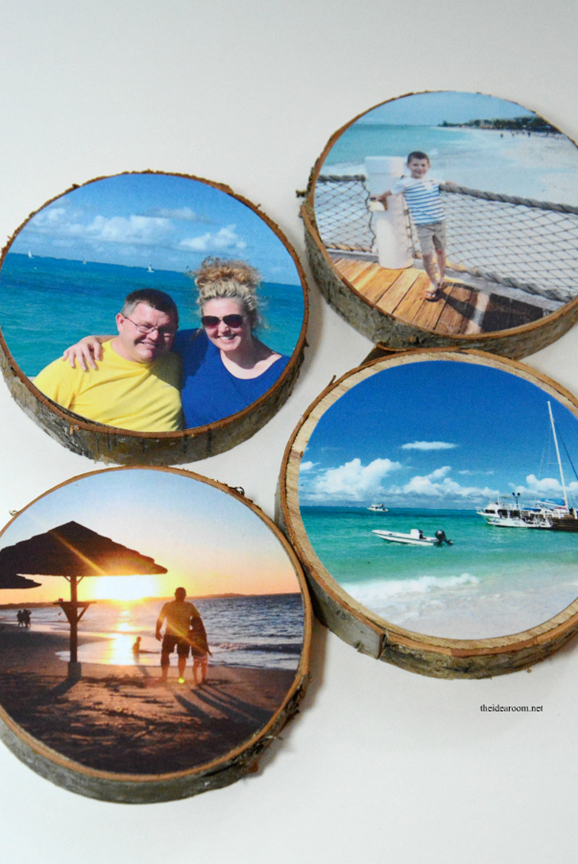
Materials
- Ceramic tiles (4×4 inches)
- Mod Podge or clear varnish
- Printed photos or patterned paper
- Foam brush
- Felt or cork sheet
- Scissors
- Adhesive spray
Instructions
- Cut the photos or patterned paper to fit the ceramic tiles.
- Apply a layer of Mod Podge or clear varnish to the top surface of the tile using a foam brush.
- Carefully place the photo or paper onto the tile and press it down firmly.
- Apply another layer of Mod Podge or varnish over the photo/paper, ensuring complete coverage.
- Let the tiles dry completely.
- Cut squares of felt or cork slightly smaller than the tiles.
- Spray adhesive on the back of the felt/cork squares and attach them to the tile bottoms, creating a protective layer.
Tips
- Choose photos that hold special memories for the recipient.
- Use waterproof Mod Podge or varnish for extra durability.
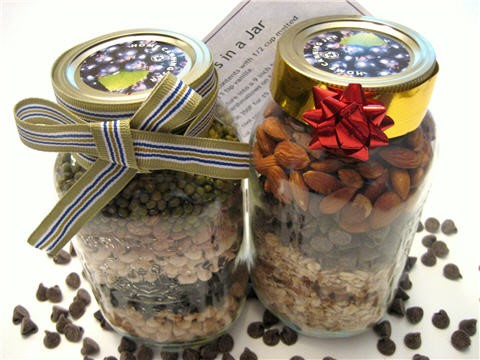
5. Homemade Hot Cocoa Mix ($5-10)
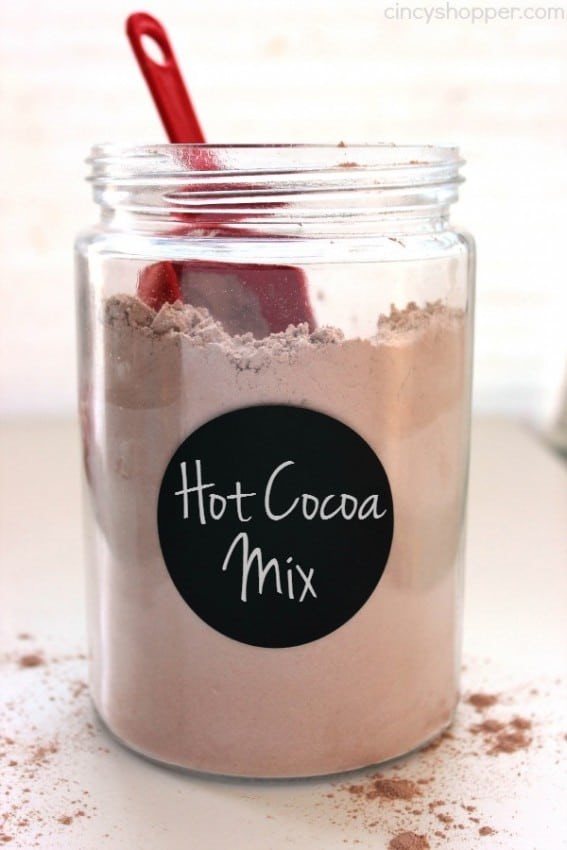
Materials
- Mason jar or decorative container
- Cocoa powder
- Granulated sugar
- Powdered milk
- Mini marshmallows or crushed candy canes (optional)
Instructions
- Layer the ingredients in the jar or container, starting with cocoa powder, followed by sugar and powdered milk.
- Add a layer of mini marshmallows or crushed candy canes for an extra touch of sweetness.
- Secure the lid and decorate the jar with a festive ribbon or personalized tag.
- Include a note with instructions for preparing the hot cocoa.
Tips
- Experiment with different variations, such as adding cinnamon or nutmeg, to customize the flavor.
- Include a small whisk or a decorative spoon as a thoughtful accompaniment.
6. Knitted or Crocheted Scarf ($10-20)
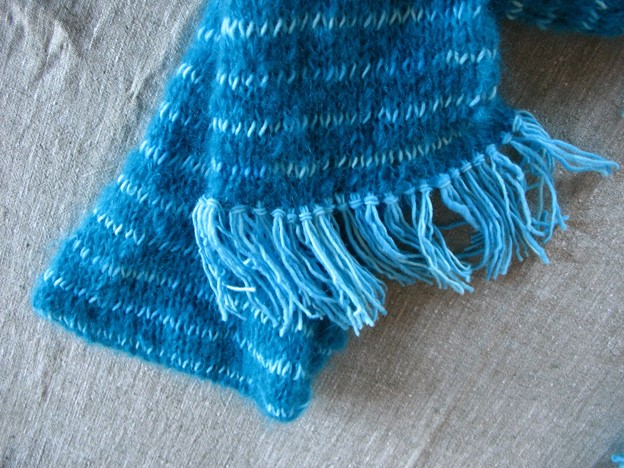
Materials
- Knitting needles or crochet hook
- Yarn in desired color(s)
- Yarn needle
- Scissors
Instructions
- Choose a knitting or crochet pattern that matches your skill level and desired scarf style.
- Follow the instructions to create a cozy scarf using your chosen technique.
- Use the yarn needle to weave in any loose ends.
- Block the scarf by gently wetting it, shaping it, and letting it dry flat.
Tips
- Consider the recipient’s favorite colors or the colors of the season for yarn selection.
- If you’re new to knitting or crocheting, start with a simple pattern like a basic garter stitch or single crochet.
7. Customized Recipe Book ($10-15)
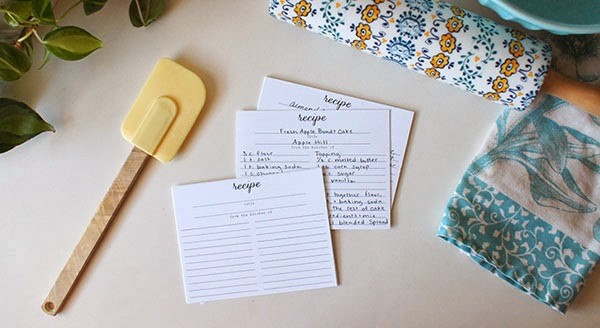
Materials
- Empty photo album or scrapbook
- Recipe cards or blank paper
- Cardstock or patterned paper
- Glue or adhesive tape
- Stickers or decorative elements
- Pen or markers
Instructions
- Arrange the recipe cards or blank paper in the photo album or scrapbook.
- Use cardstock or patterned paper to create dividers for different recipe categories (e.g., appetizers, desserts).
- Write or print out your favorite recipes, and glue or tape them onto the pages.
- Decorate the pages with stickers, decorative elements, or personal notes.
- Customize the cover of the album with the recipient’s name or a special message.
Tips
- Include family recipes or cherished dishes to make the gift more sentimental.
- Leave some blank pages for the recipient to add their own recipes.
8. Homemade Bath Bombs ($10-15)
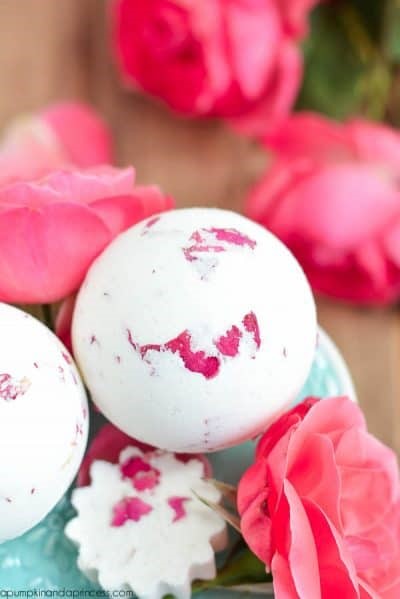
Materials
- Baking soda
- Citric acid
- Epsom salt
- Essential oils (e.g., lavender, eucalyptus, or rose)
- Food coloring (optional)
- Coconut oil
- Water
- Bath bomb molds
Instructions
- In a large bowl, mix 1 cup of baking soda, 1/2 cup of citric acid, and 1/2 cup of Epsom salt.
- In a separate small bowl, mix 2 tablespoons of melted coconut oil, a few drops of essential oil, and a few drops of food coloring (if desired).
- Slowly pour the liquid mixture into the dry mixture, stirring constantly.
- Add water, 1 tablespoon at a time, until the mixture holds its shape when squeezed.
- Fill each half of the bath bomb mold tightly with the mixture and press them together.
- Let the bath bombs dry in the mold for 24-48 hours, then carefully remove them.
- Package the bath bombs in a decorative box or bag.
Tips
- Experiment with different essential oil combinations for various scents and therapeutic benefits.
- Add dried flower petals or glitter to the mixture for a visually appealing bath experience.
9. Customized Tote Bag ($5-10)
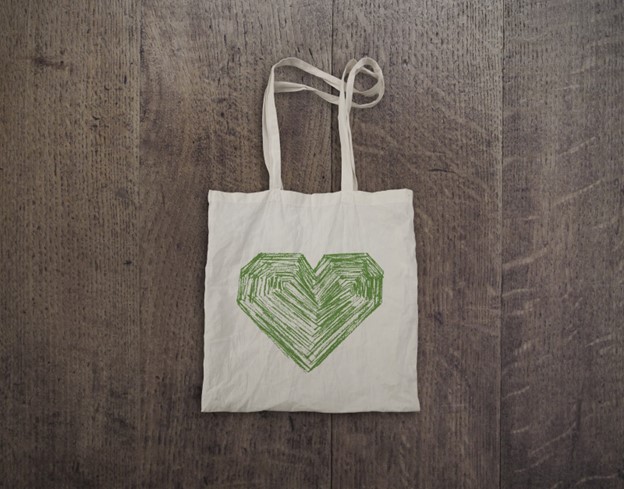
Materials
- Plain canvas tote bag
- Fabric paint or markers
- Stencils or templates (optional)
- Painter’s tape (optional)
- Paintbrushes or fabric markers
Instructions
- Lay the tote bag on a flat surface.
- Use fabric paint or markers to create a design or write a personalized message directly on the bag.
- Alternatively, use stencils or templates to create more intricate designs.
- If using multiple colors, let each color dry before applying the next one.
- Use painter’s tape to create clean lines or separate different sections of the design.
- Let the paint dry completely according to the manufacturer’s instructions.
Tips
- Consider the recipient’s interests or hobbies when designing the tote bag.
- Wash and iron the tote bag before decorating to ensure better adherence of the paint or markers.
10. Herb-infused Olive Oil ($10-15)
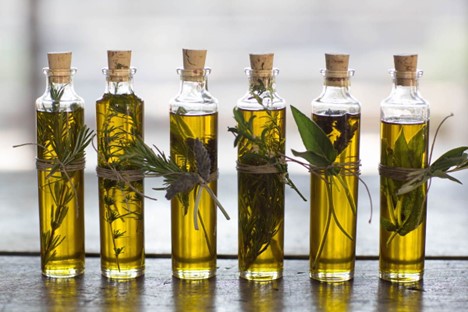
Materials
- Glass bottles with cork stoppers or tight-fitting lids
- Extra virgin olive oil
- Fresh herbs (e.g., rosemary, thyme, or basil)
- Funnel
- Labels or tags
Instructions
- Wash and dry the herbs thoroughly.
- Place the herbs in the glass bottles, using a combination of different herbs or a single herb for each bottle.
- Slowly pour the extra virgin olive oil into the bottles using a funnel.
- Ensure that the herbs are fully submerged in the oil.
- Secure the cork stoppers or lids tightly.
- Let the bottles sit in a cool, dark place for at least a week to allow the flavors to infuse.
- Attach labels or tags to the bottles, indicating the type of herb-infused oil.
Tips
- Encourage the recipient to use the herb-infused olive oil in salad dressings or as a flavorful dip for bread.
- Experiment with different herb combinations to create unique flavors.
Creating DIY Christmas gifts not only adds a personal touch to the holiday season but also brings joy and warmth to both the giver and the recipient. With these easy and affordable ideas, you can unleash your creativity and craft heartfelt presents that will be cherished for years to come. So, gather your materials, embrace the festive spirit, and let your imagination guide you as you embark on a wonderful journey of DIY gift-giving this Christmas.